How I Approach Making a Felt Vest
Pat Spark ©
2015
There are many different ways to plan a felt garment. I am a plus sized woman and to
get something that I would actually wear that fits me, I prefer to do the
following:
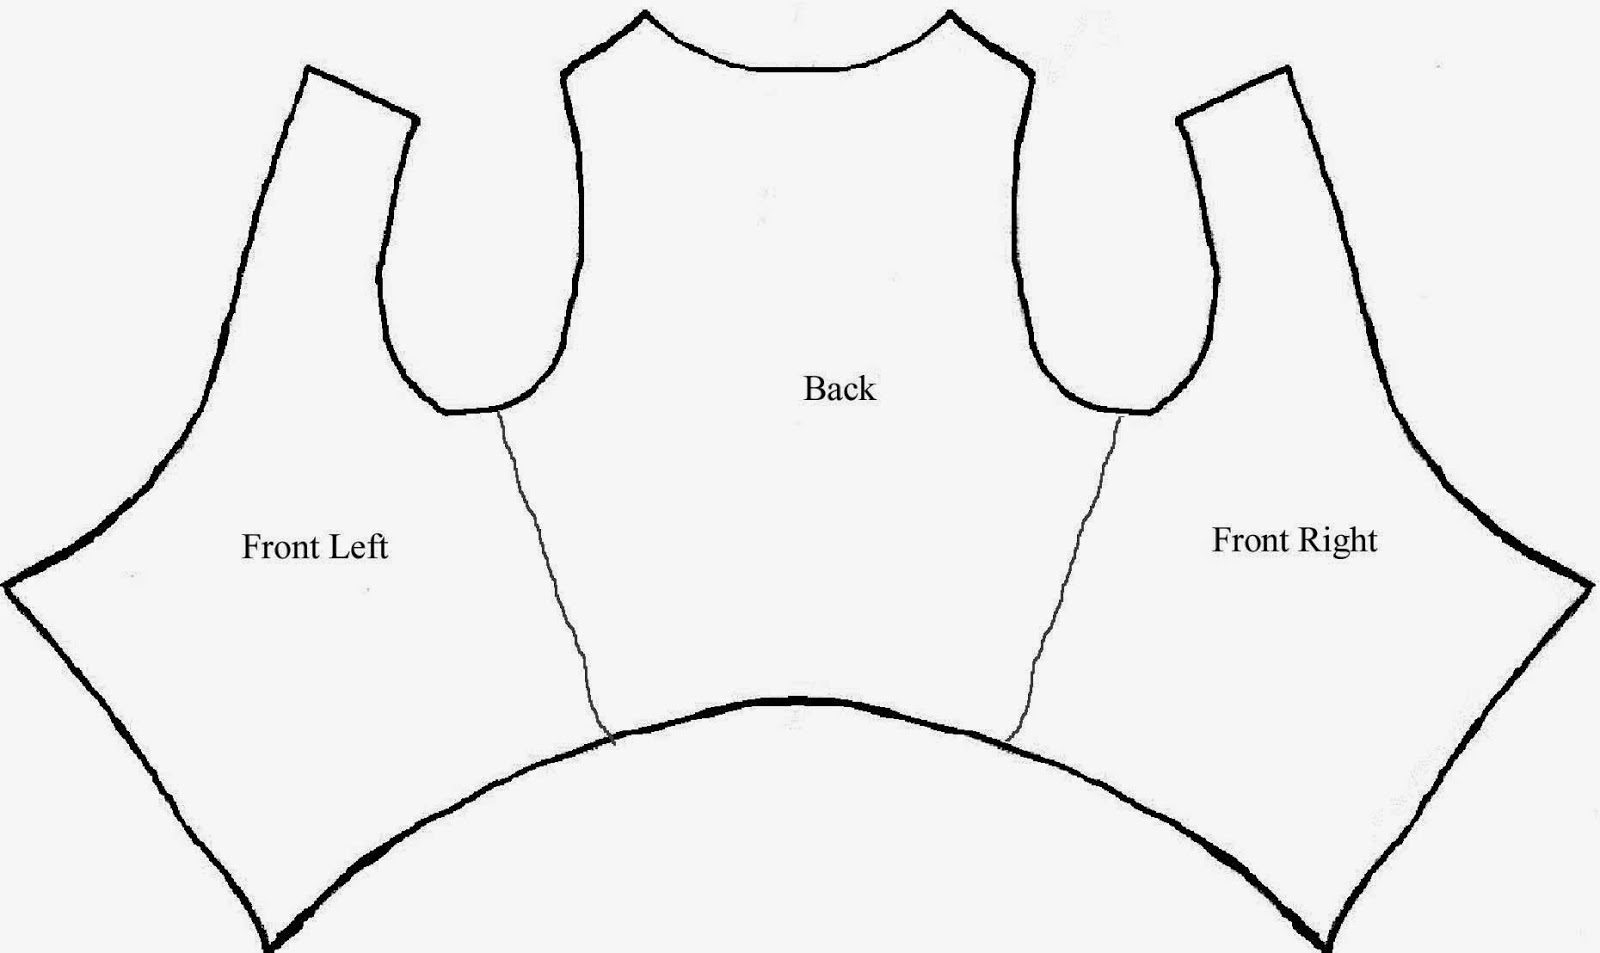
A sample of a sewing pattern from Rosemary Eichorn I used to make the white felt vest below. She wrote a book on sewn mosaic vests and the patterns she used in the book were quite good for "art" vests. (The Art of Fabric Collage: An Easy Introduction to Creative Sewing.
Unfortunately, her patterns are no longer made, but maybe you can find them on Ebay.
2. I cut the pattern out of an old piece of cloth (from an old sheet) and baste it together to see how it fits.
3. I make adjustments on the cloth pattern until it
fits well. I open up the cloth pattern
and make paper versions of the adjusted cloth pieces. I can then use these pattern pieces on felt
yardage and cut out the pieces and sew them together.
Or if I want to make a seamless garment I do the
following:
4. I make a 20 Inch (50 cm) square sample using the
types of textures, cloth and fiber I want to use in the final felt garment. I carefully take before and after
measurements of this sample so I can figure out the shrinkage. Since I often lay fiber in only one
direction, the resulting shrinkage will be greater in that direction and the
square becomes a rectangle.
5. Now that I know the shrinkage in each direction,
A.
I slash the paper pattern vertically and spread the pieces apart to allow for
the width wise shrinkage. I tape this
altered pattern to another piece of paper and cut around it.
B. Then I slash the new paper pattern
horizontally and spread the pieces apart to get the height shrinkage allowance.
These pieces are then backed with more paper to stabilize them.
 |
| Horizontal Slashes |
I redraw the pattern, smoothing out the contours.
6. If the pattern is a simple vest with straight or
slightly curved sides, I can use the back pattern piece to make a template for
the seamless garment. To do this, I just use the enlarged back piece and add to
the pattern at the neck, arm holes and the bottom. I do this so I have no chance of accidentally running over
the edge with some fiber and hooking together the front and back at these
places. The two overlapping fronts will
be done one at a time to connect onto the back.
But usually, I want a more shaped garment so then I
have another choice. I make an enlarged
template for each pattern piece. Then I lay out the fibers, textures, etc.
using the templates as guides. I felt
them down to size and sew them together. (Or use the Embellisher - needle felting
sewing machine - to attach them together.)
I usually extend the enlarged pattern pieces at the shoulder and the
side seam so I can overlap the back piece and have an interesting felted edge.
7. I haven’t tried the technique some people use which
is to make each of the enlarged pieces of felt but keep the seam edges
unfelted. When the pieces are at
pre-felt stage, you can overlap the unfelted seams and felt them together. Then continue to felt the whole garment. This looks as though it would allow a more
shaped look but still be felted together instead of sewn.
NOTE: In the following photos, the back pattern
piece was extended at the side seams, to overlap the front pieces, while the
front shoulders were extended to overlap the back piece. Complicated I know, but I do this to help
break up the vertical line caused by a sewn seam. Also, I LOVE irregular felted
edges and don’t necessarily like straight, cut edges.
“Roses, Ruffles and Ripples, Oh My!” Felt
vest by Pat Spark, ©
2013.
(Textures influenced
by Vilte Kazlauskaite.)
 | |||
| Vest from the Front |
 | |
| Vest from the Back |
 | ||
| Side Seam, Back Piece is Extended to Overlap the Front |
 |
| Shoulder Seam, Front Piece is Extended to Overlap the Back |
 |
| Detail of Front |


.jpg)


