Sunday, October 6, 2013

Pine Needle Felt- Learning From Leiko Uchiyama

In April, I traveled down to California to the Tin Thimble to take a class from my friend Leiko Uchiyama.   I was finally able to get the time to download the photos from the workshop I took at this workshop.  I took the Pine Needle Samples workshop with her.  It was a terrific class and I really enjoyed seeing Leiko again.  We figured it had been almost ten years since we had seen each other!  
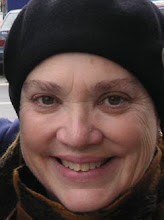
Here are Leiko and I with one of her pieces at an exhibit she was featured in.


I was having difficulty with the technique at first because I made my "needles" too thick, but I persisted and eventually got the technique correct. I then tried other fibers (the teal one below left is a silk/wool blend) and putting the lace into a shape (The red background with a circle of orange lace in the middle below right.)  I really felt good about these samples-like I accomplished something because I could get the lovely lace.  Eventually, it is this technique I used in my project.
Notice that the piece on the left is too thick, while the one one the right is correct. 


We worked another sample in her class as well.    Here is the front and back of that sample.


The project I did make is a shawl. After doing the samples, I was inspired to make a felt of a long ago memory- the memory of long pine needles falling into the water at a lake and gathering in a group like tumbled pick up sticks as the lake swells pushed them to shore. This is the resulting shawl, more lovely in real life than in the photo. I love the fine merino I used from Opulent Fibers in Portland, OR. Their colors are yummy and the photos don't do them justice. The photo on the right is closer to the colors than the one on the left.


I decided to make this shawl my project for the “Water” theme from Felt United’s International Day of Felt.  (October 5, 2013) It was a terrific theme, and it fit in well with my memory. 

I’m not sure when I will use these techniques again.  But I was quite pleased with the knowledge I gained from this class.  And, of course, getting to see Leiko again.
 

Saturday, August 17, 2013

Textured Felts - "Cracked Mud"

The family went on vacation this last week.  I carried along my felting supplies and took advantage of the large dining room table and convenient access to a dryer in the condo to do some felting.  I made several laminated prefelts using the dryer so I can run the dye experiments I talked about a couple weeks ago. I need to figure out  what dyes I used in my original laminated prefelt resist dyed pieces and I need some felted fabrics to practice on.

But I was most excited about finally having time to try out some of the texture samples I wanted to make.  The first one I made created a look I think is reminiscent of dried, cracked mud.  I was inspired by the tutorial of Love Voronin (http://www.livemaster.ru/topic/61153-idei-iz-moej-kopilki-chast-2?)
Here is a picture of the finished sample: )
 

 To make this, I cut a grid out of resist material.  (I use the liner that goes under laminated floors from Ikea, (http://www.ikea.com/us/en/catalog/products/00018076/)  
1. I laid down two thin, crisscrossing layers of 19 micron merino fiber in a ten inch square and wet the fiber down with soapy water.

2. At this point, I realized that the outside border on the resist grid was too wide so I cut it down to a smaller size and laid it on top of the wet fiber. 


3. I covered the grid lines with another layer of fiber.
4. I then covered the whole thing with two more crisscrossing layers of fiber.  The photo below shows the second layer in the process of being added.


5. I wet out the whole stack and felted it until it was a hard fabric.
6. Since it was easy to see the resist grid, I could cut down the middle of each grid line and around the outside edges, freeing the grid.

7. I removed the grid.

8. I then felted the fabric some more to harden the cut edges.

I think it was very successful.


Sunday, July 21, 2013

Found Laminated Prefelts from Last Summer!

Yay!  I was moving things around in my living room and found the laminated prefelt samples I did in Pam de Groot's class last summer!  The bag of samples had fallen down behind a book case.  When I was unpacking from my teaching trip to Bellingham, I must have put the bag on top of the book case and it was somehow  knocked off behind.  I'm happy.  The only problem is, the colors are totally different than the ones I used in my new set of samples.  My new samples were dyed with Jacquard Acid dyes and the old ones were dyed with Landscape dyes.  I really couldn't remember what the original prefelt colors looked like exactly so I went with a totally different colorway in the new prefelts.

I am going to need to make more laminated prefelts to make the vest.  Now, hard decision, which colorway should I use?  I have ordered some Landscape dyes in what I think are the colors we used last summer.  I don't think I could replicate these colors using the Jacquards that I have and since the colors are mixed, I don't think I could mix them exactly either.  More experimentation!

 Dyed Laminated Prefelts I made in Pam de Groot's Class


Saturday, July 20, 2013

Dyeing and Sampling with the Laminated Prefelts

Here is a continuation of the laminated prefelt saga.  As I mentioned in my last blog postI lost the resist dyed laminated prefelts I made last summer in Pam de Groot's class at the Midwest Felting Symposium in Madison, WI.  I really want to make a vest with this technique, so I am making more samples.  In my last post I showed the way I used the No Roll Method to make the white prefelts.  Since then I have clamped, tied and otherwise resisted the prefelts and dyed them in a variety of colors.  Now I am sampling with them to see what background I want to felt them onto, since some of this background will show between the laminated prefelts. 

I want to use the method Pam talked about in the class which I've never had a chance to try.  As I understand this method, a ground cloth of fine silk gauze is laid on the work surface.  Then two thin criss-crossing layers of 19 micron merino top are laid on the gauze.  This wool will act like a glue to attach to the cut up pieces of laminated prefelt that are laid on top.   The prefelts are put onto the loose wool with their wool side facing down and the silk side up.  When these felt together, the loose wool has grabbed both the base fabric and the cut up collages pieces of prefelt.  So far, in my first sample, this worked like a charm!  When I choose the laminated prefelts I was going to cut up for the samples, one of than prefelts was more felted than the other.  I thought this might be a problem, but it wasn't. I also made sure to choose a laminated prefelt that was made with silk gauze and one made with habotai, to see if the different fabrics would make a difference.  They both seemed to work well.

The Resist Dyed, Laminated Prefelts


Here are the laminated prefelts that I resist dyed.  In the photo above, the pieces on the right are showing the silk gauze side of the prefelt.  The pieces on the left are habotai.  The bottom picture shows a prefelt with the silk gauze side showing. 

The first collage sample was laid onto a black silk base with black fiber.  I was very happy with the sample, but I am making a second one, with bands of differently colored wool so I can see if I like one of these colors better with my dyed prefelts.

The Samples for the Vest


Finished sample on left.  The sample shrank from 10 inches square to 7 inches.
In process sample on right. 


 Detail of sample in process.

Larger view of sample one (black background). 


Sample two (blue, olive,purple background). 
 (NOTE: This photo doesn't show the purple background very well. On my monitor it looks brown but it's really a nice dark purple.)

 Layout of sample three. 
Sample three finished (cyan, burgundy, plum background).  
(NOTE: The blue should be more turquoise.)


So, after looking at the samples, here's what I've learned: 
1.  I do like the black one the best.  
2. With the other colors, it seems like the darker colors worked best with the colors I used in my dyed prefelts. I don't think the middle value colors worked as well.  Although, doing a color run with one color carded into another for the background might be interesting.
3.  I think in the vest, I will use larger pieces of laminated prefelts.  The smaller pieces start to look chaotic to me.  I do like cutting into the larger pieces and then floating another design in the negative area. 
4. The closer to the edge the laminated prefelts are put, the more difficult it is to control the shape of the edge.  Because the prefelts don't shrink at the same rate as the rest of the felt, they push out the edge.  This could be a cool design element through- something to think about- maybe along one front edge of the vest.
5. In my dyed laminated prefelts, I tried very hard to not have a lot of color contrast.  I worked at getting rid of most of the yellow from the first dyebath.  But after felting, the yellow is much more subdued and it is helps to give some life to the rest of the colors.  Any subtle differences between the colors became even more subtle. 
6. I didn't think I was going to like the shapes made from the habotai/wool prefelts.  In the prefelt stage, the colors weren't very strong.  In that stage, the gauze showed up more color.  But after felting, the habotai gathered into a wonderful texture and the dyed colors condensed together.  Also, the sheen of the silk habotai helped the colors appear richer.  The silk gauze had a duller appearance and its texture was much finer so it had a much flatter appearance in the samples. 


Saturday, June 29, 2013

In April I traveled to California to study with Leiko Uchiyama at the Tin Thimble in Loomis, just outside of Sacramento.  I also took a fast lesson in how to make felt by the no-roll method from Sharon Mansfield, one of the co-owners of the Tin Thimble.  Well this weekend was the first time I've had a chance to try this method. I needed to make some laminated pre-felts that I will resist dye sometime soon.  Normally this would have required a lot of rolling, so I wanted to try this method.

BTW, I needed to make some of these laminated pre-felts because I lost some samples of resist dyed cloth backed pre-felts that I made in a class I took with Pam de Groot last summer. I actually took two of her classes at the Midwest Felting Symposium in Madison, WI.  I enjoyed both classes.  But I was really intrigued by the Mosaic Taster class I took.  In this class we laminated 19 micron merino top to silk fabrics to create a backed pre-felt.  (A pre-felt with a cloth face.)  We then resist tied these pre-felts and dyed them in acid dyes.  The idea was that we would make a patterned purse by cutting up these various dyed pre-felts and laying them on a wool covered template with the wool side of the pre-felt facing down against the wool covered template.  In this way the wool sides could felt together, with the silk side of the pre-felt facing out.  (The silk shows the resist dyed patterns better than the wool side, imo.)  For various reasons, I didn't make a purse with my dyed pre-felts.  I have been thinking ever since about how to use these lovely gems.  I wanted to make a vest with the dyed pre-felts creating a pattern on the surface.  But I wasn't sure about how to go about this.
        Well, finally, I figured out a plan for the vest when I was teaching in Bellingham last week.  I was so excited to get started!  But, somehow, between Bellingham and home in Albany, I lost this bag of samples. : (
        So I decided to make some more pre-felts today.  I had wanted to try the no-roll tumbler dryer method of making felt, so I used it on the laminated pre-felts.  I used 19 micron merino, and two different cloths.  One was 5 mm silk habotai (paj) and the other was 3.5 mm silk gauze. The no roll method worked so well!   I'm very impressed.  I made seven different chunks of pre-felt today that will eventually be resist dyed.  And I barely broke a sweat, even though the temperature here in Oregon is in the 90's.
        I put out a piece of 1 ml plastic and put silk fabric on it.  Then I laid the merino on the silk in two, thin layers.
Photo shows second layer of wool in process, covering the silk gauze. 
 I wet out the whole thing with cool, soapy water and covered the wet pile with another piece of 1 ml plastic.  I sprinkled a little soapy water on top of the plastic so my hands would slide easily and I rubbed my hands over the surface for a short time. 
Photo shows covering the wet pile with a second layer of plastic. 
Photo shows rubbing the top of the plastic.  My hands slid easily over the plastic because it was wet and soapy. 
 I folded over the edges of the plastic drop cloth so it was tight against the wool stack.   I rolled up a damp towel and placed it on one end of the drop cloth.  I rolled the towel up with the plastic covered wool/silk stack and tied it with strips cut from an old t-shirt.
Photo shows rolled bundle, tied with t-shirt strips.
       I put the first tied bundle in the dryer on air fluff only for 20 minutes (This was too much time and the felt was almost too hard to use as a pre-felt.  I changed the time, until eventually I was doing it for around 5 minutes in the dryer.)  Some of the pre-felts were done after the first time through the dryer, while others needed to be rolled from the opposite end and put back into the dryer for another 5 minutes.
        In a day, I was able to make a nice stack of laminated pre-felts using both the habotai and the gauze.  I was super impressed with the process and the fabric backed pre-felts came out really well.  I'm looking forward to dyeing them.